< Back
Aion FX Halo Distortion / Sustainer
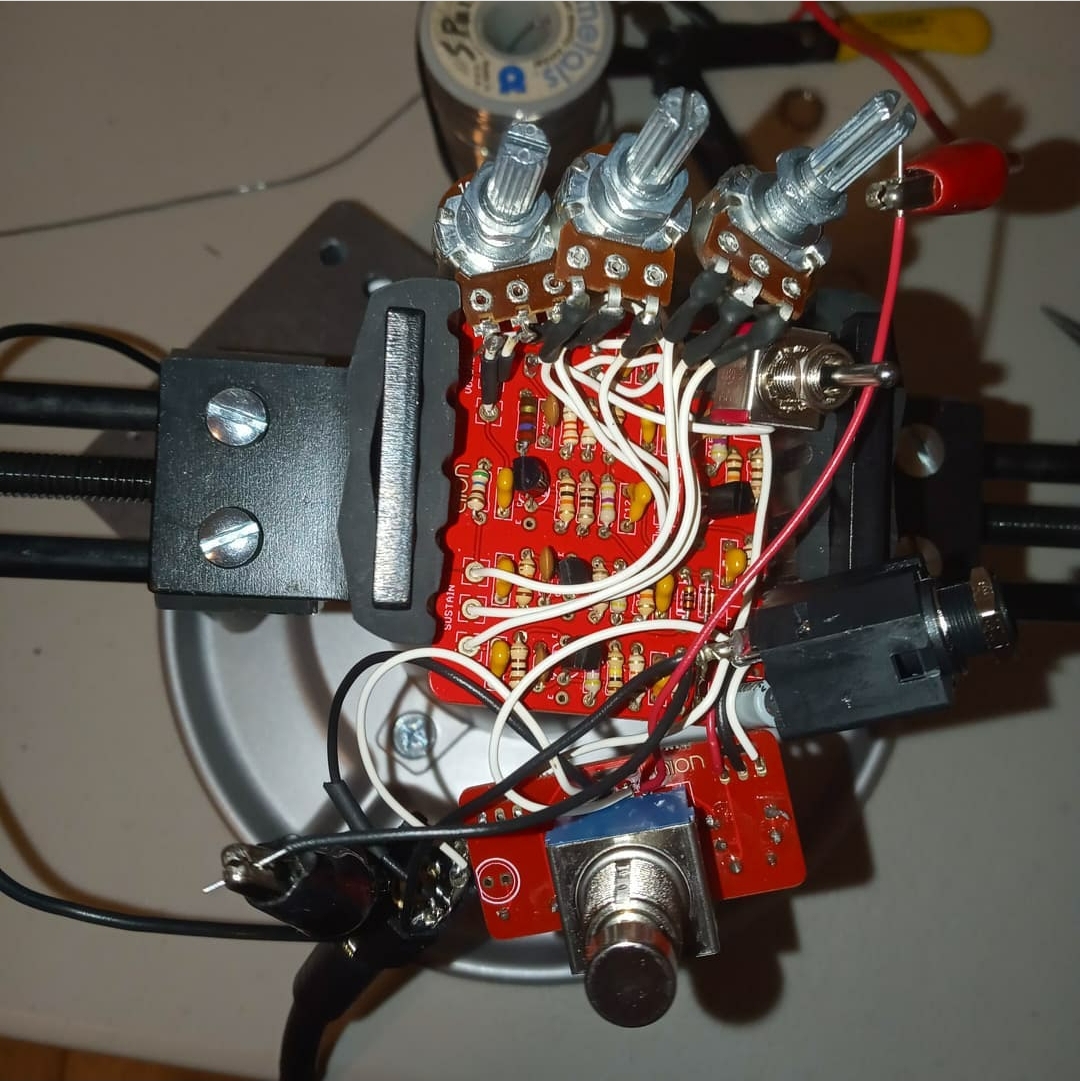 This build was very simple. In the range of ~40 components, it was a day's work with a nice soldering iron. I did run into some difficulties when I used an enclosure that was too small for the PCB, but in the end I did make it work (with a lot of electrical tape 0_o). Very fun to build and would recommend to anybody trying to get into pedalbuilding.
The entire building process is shown below:
- Solder the PCB
- Solder external components (Buttons, switches, LEDs)
- -Mark the enclosure of the pedal (Use the external components to mark areas to drill)
- Punch the enclosure. Then machine the aluminum with a hand drill since you don't have the proper tool to drill holes.
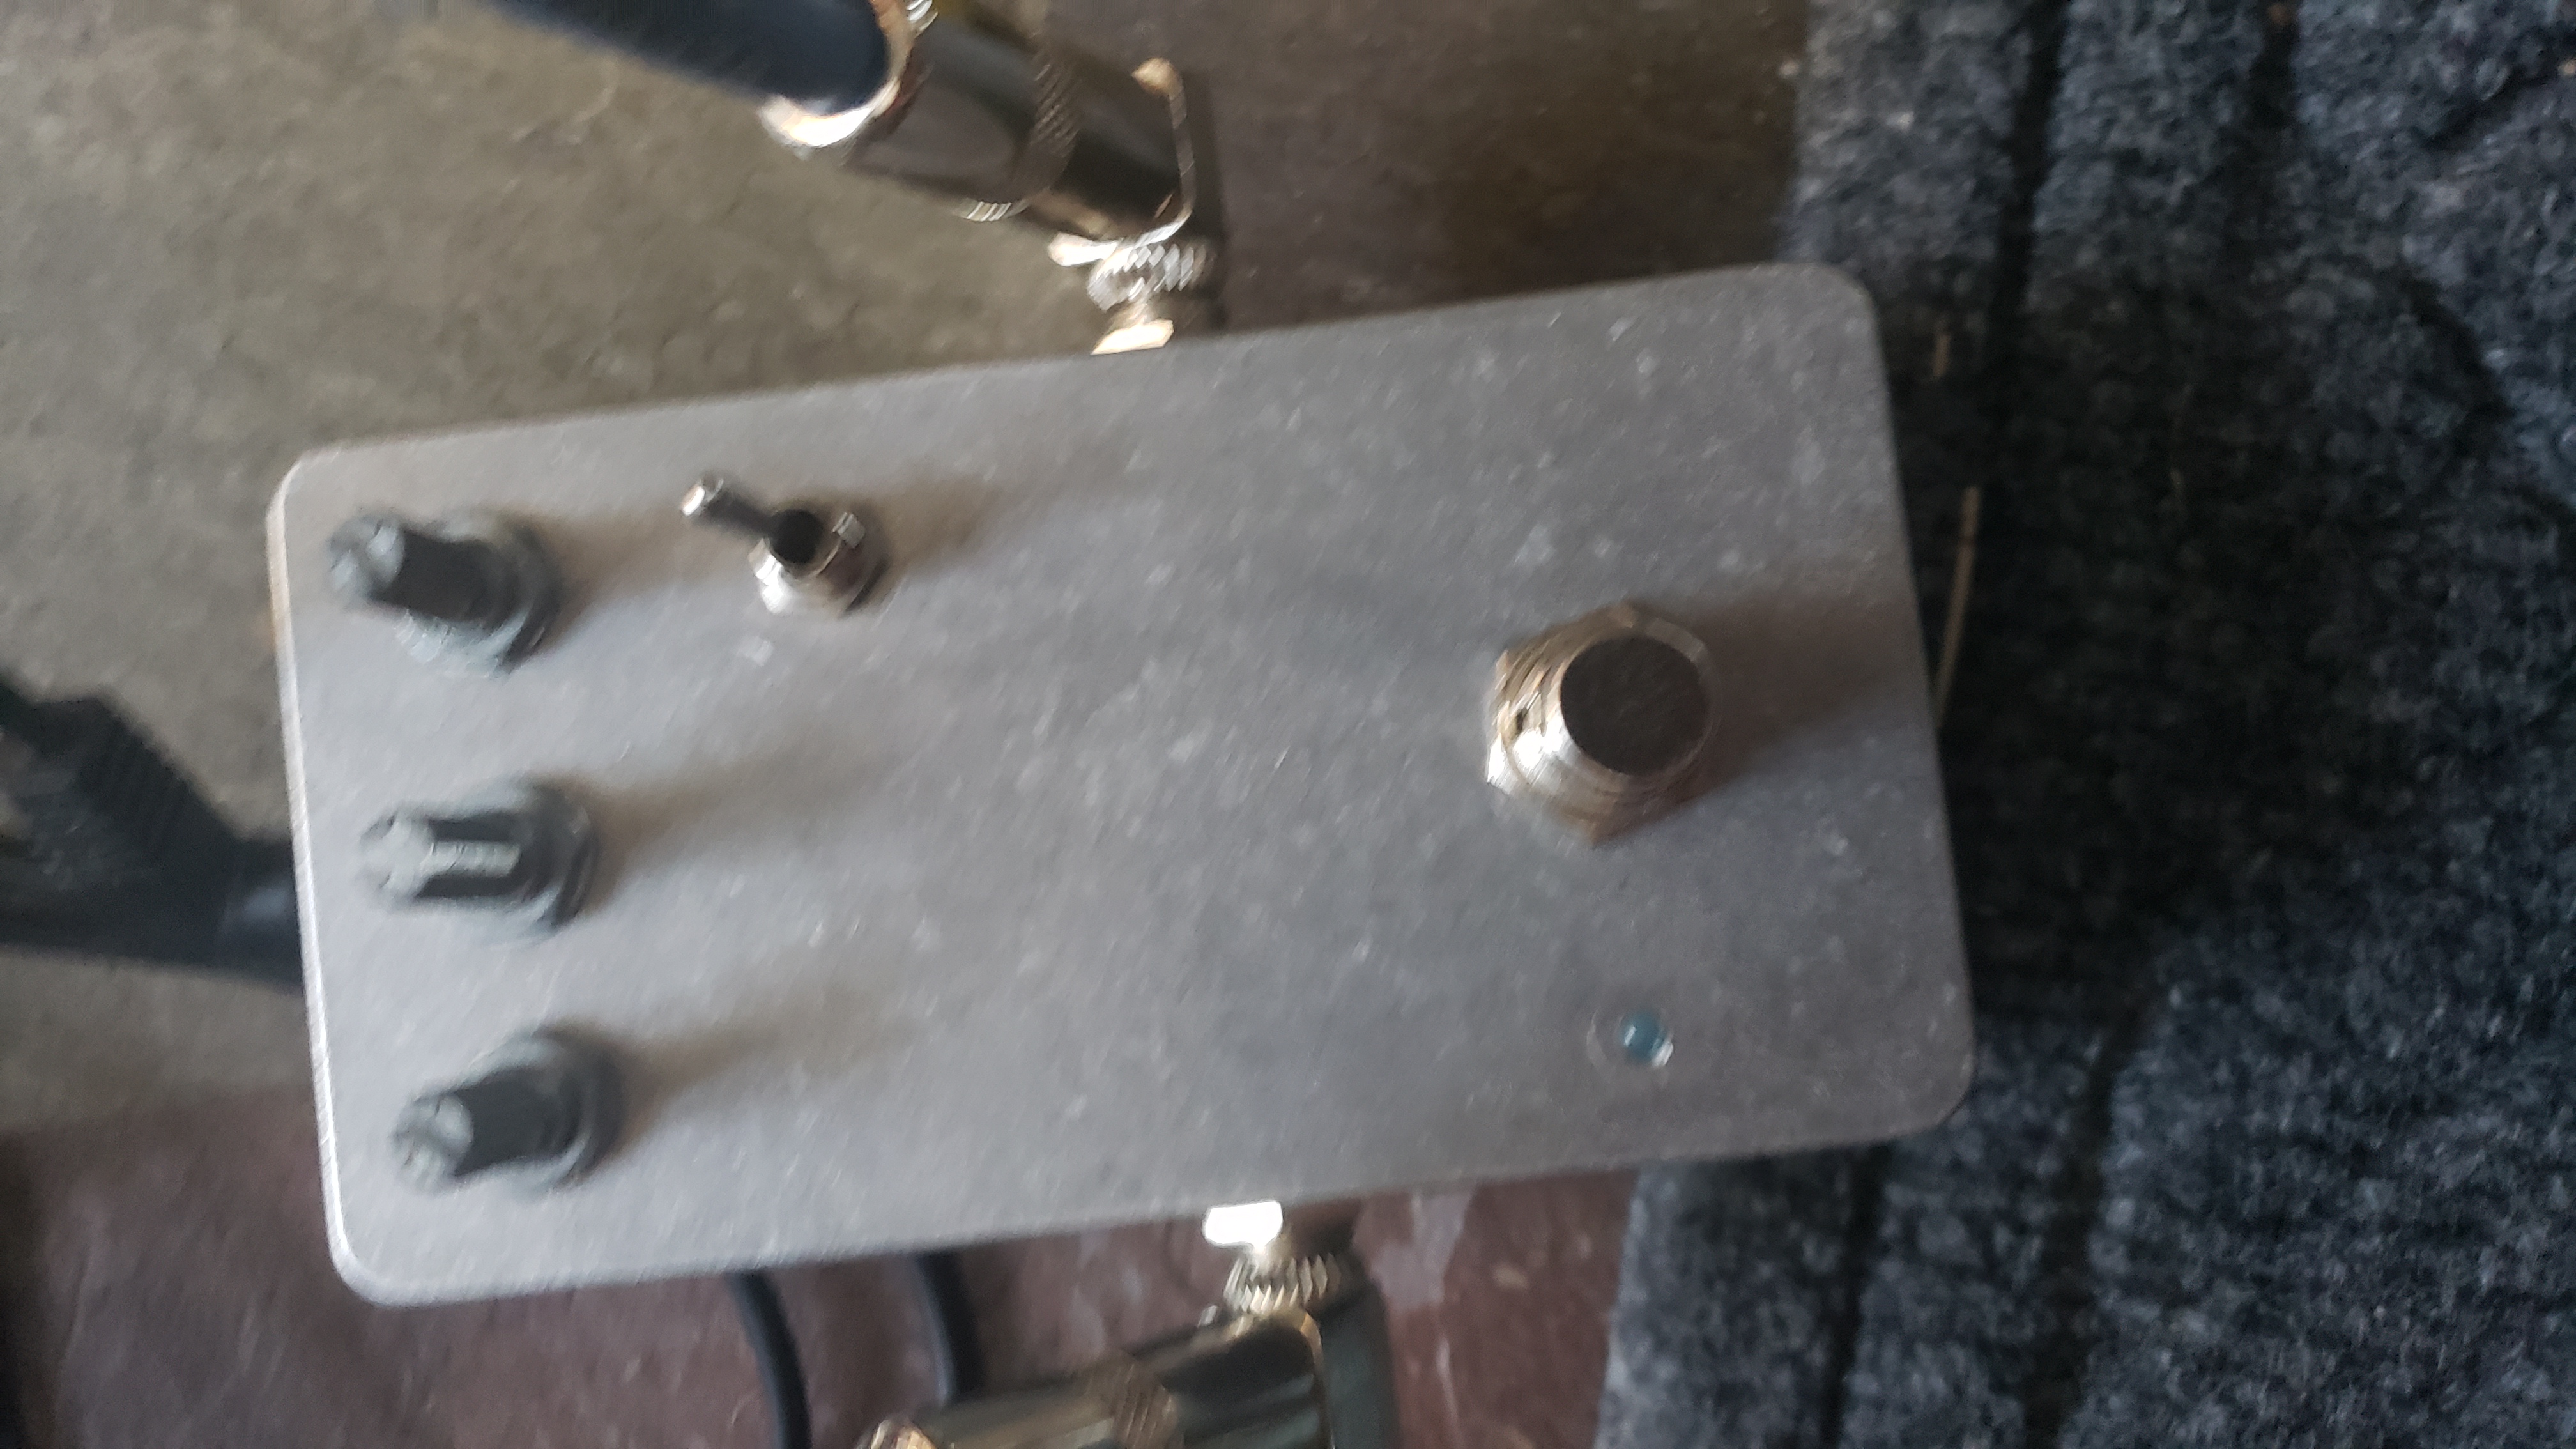
- Try to fit the entire pedal inside the enclosure. Find out that you accidentally ordered a Hammond 1590b instead of a 125b and can't fit the pedal properly. Coat the entire 1590b with electrical tape then jam that pedal in there.
- You now have a pedal that works sometimes (since your electrical tape job was not perfect). Congrats on completeing your (scuffed) pedal build!
Anyways, this specific build can be found at Aion Halo.
A picture of the finished PCB is on the right.
A picture of the finished product is below the picture on the right.
Aion Blueshift (WIP)
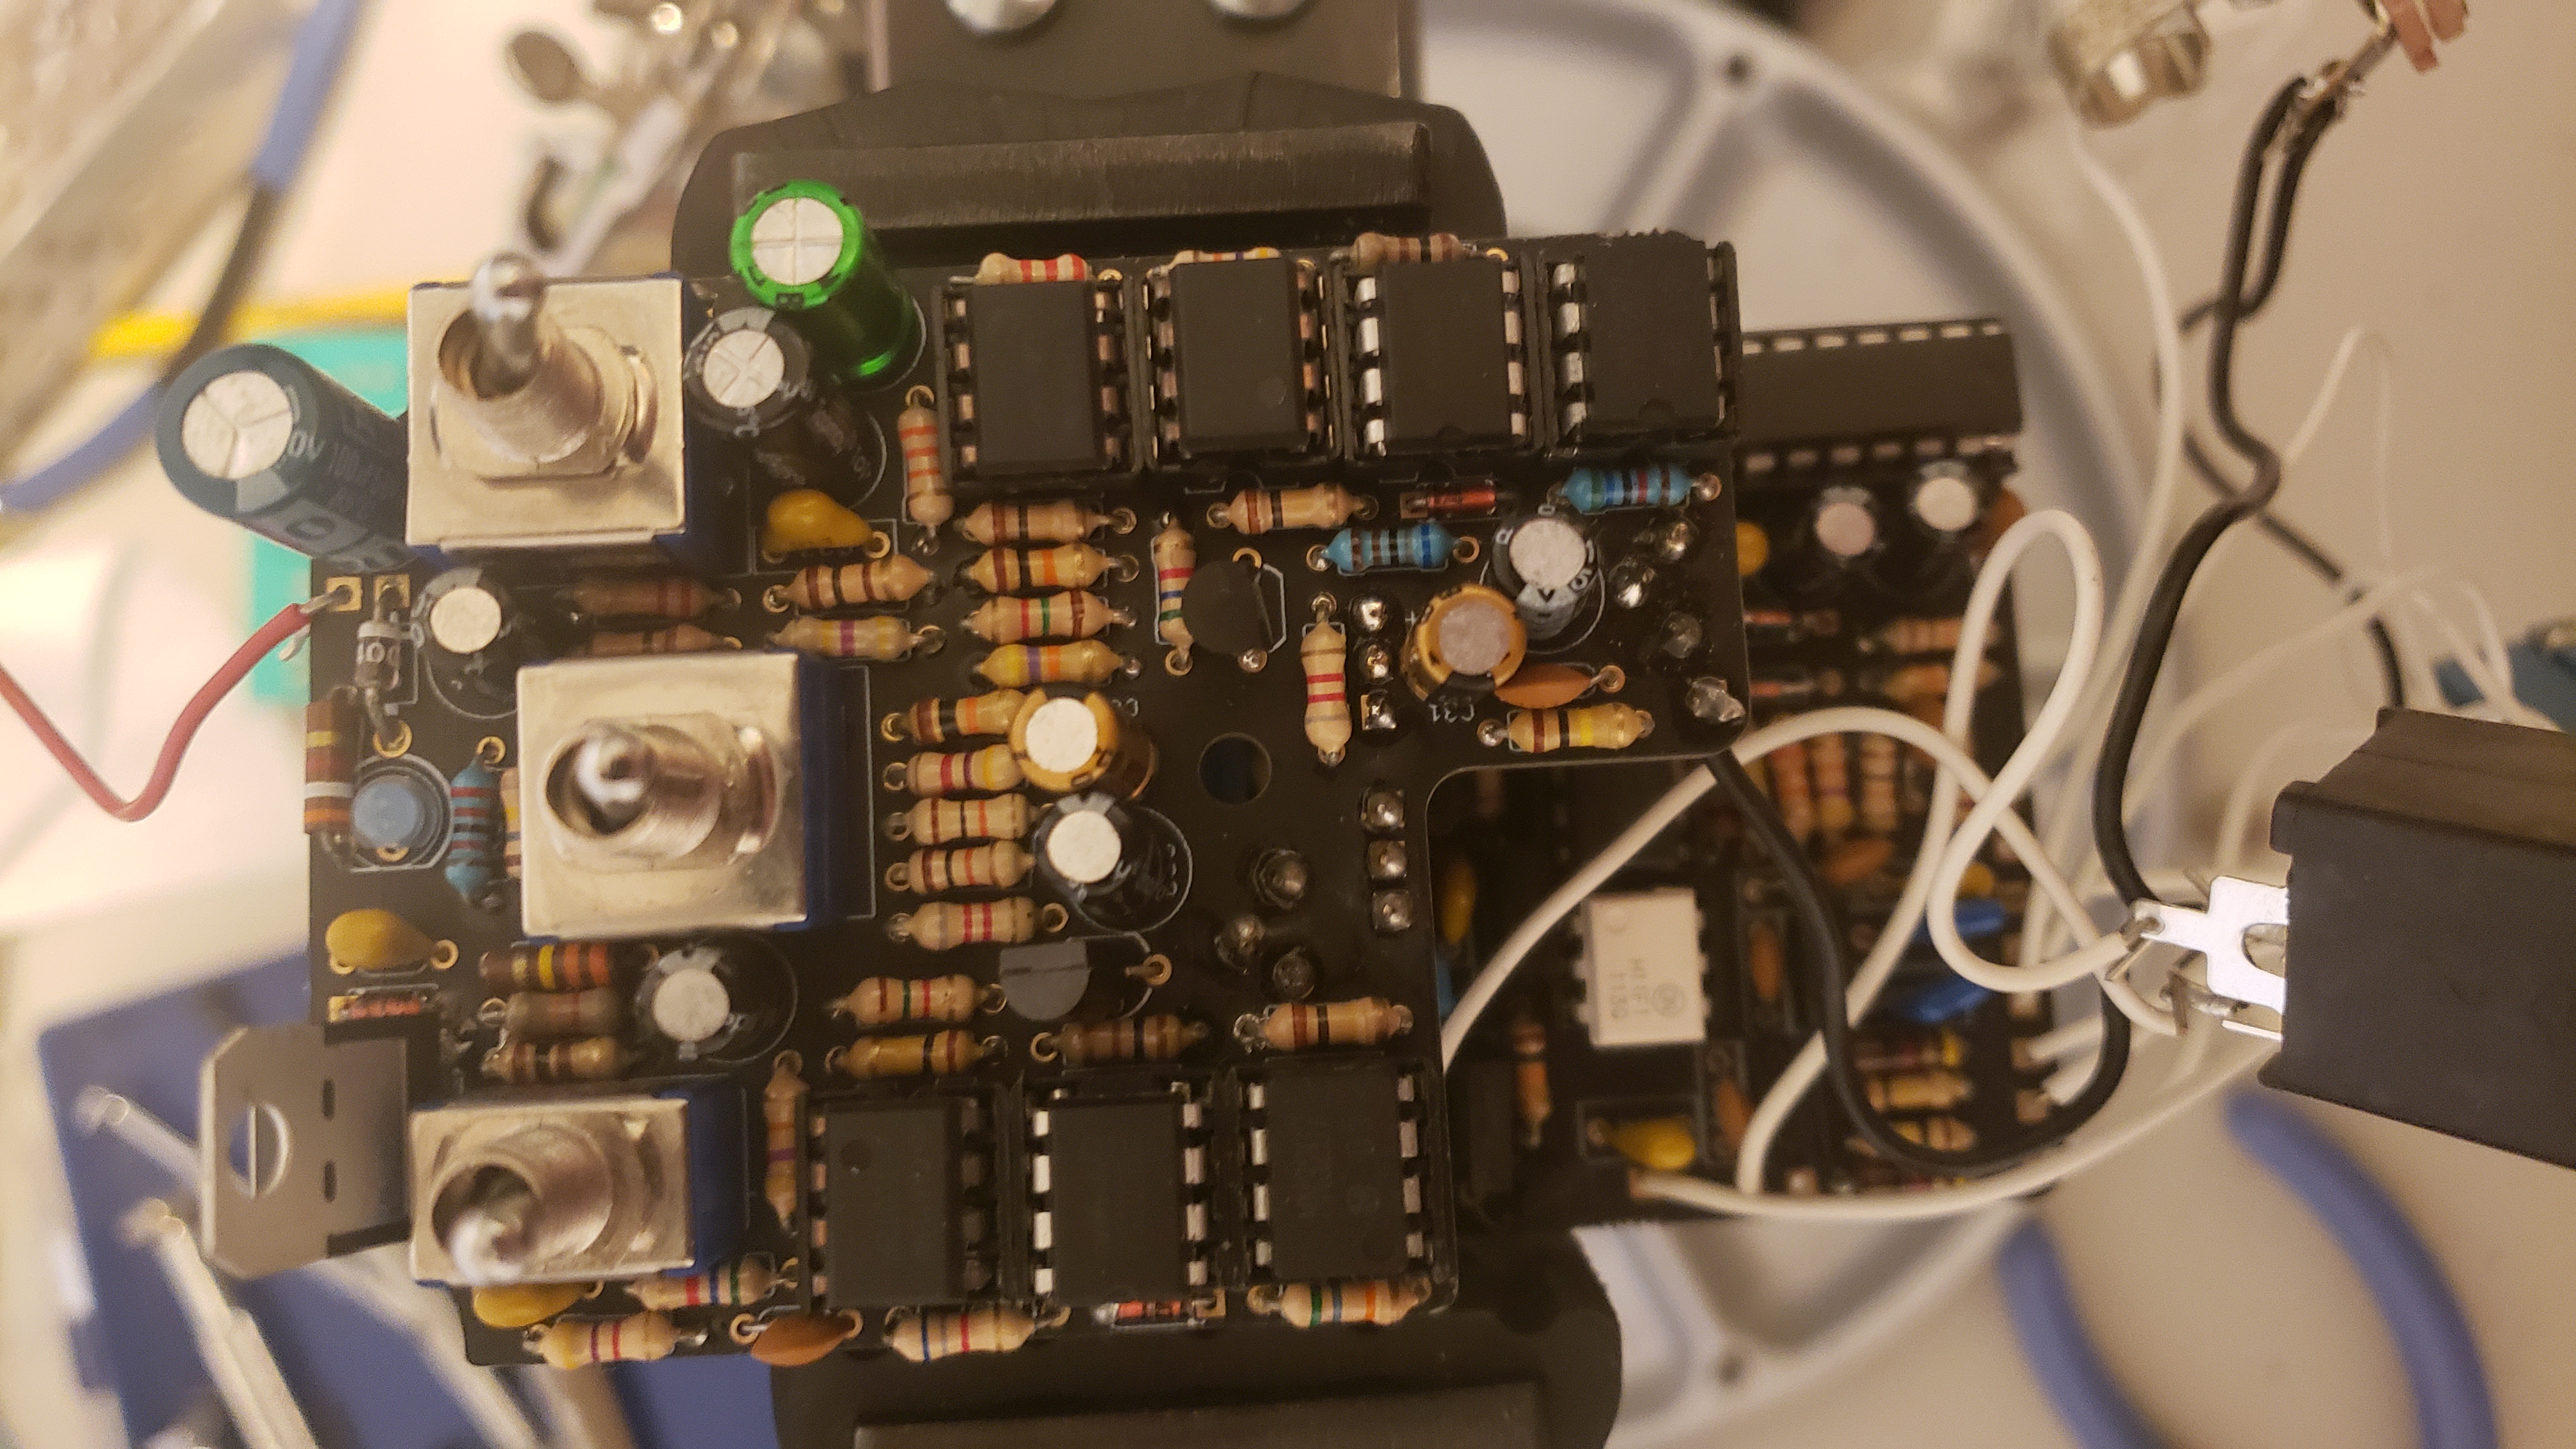 This one is a doozy. A dual pcb monster with over 100 resistors and 60 capacitors. I started working on this one, and foolishly did not heed Aion FX's warning. This is an ADVANCED build. I have finished the entire PCB only to realise that I soldered the voltage regulator on the wrong orientation (it started burning). I am still troubleshooting the PCB and will update this page if I end up fixing the pedal.
***Just an update in 2025, the components are messed up and I will not be able to use this.
Picture of finished PCB to the right. The MOSFET looking item on the top left is the voltage regulator.